 Member Erase by Piecemark
- Step-By-Step
- Tips and Tricks
- Related Tools
1 . Click the Member Erase by Piecemark icon, which is pictured above. The icon can be found on the Members page > Erase section.
Alternative: Invoke Member Erase by Piecemark using the Find Tool by searching the command name and clicking the icon, which is pictured above.
Learn more about alternative methods for launching commands.
2 . A selection dialog opens. On it is a list of all piecemarks that have been assigned to members. Double-click the piecemark of the member you want to erase.
Alternative: Press Esc or click Cancel to end the command without erasing any members.
3 . The status line prompts, "Erase this member?" Left-click (Yes) to erase the member and end the command.
Alternative 1: Right-click (No) to end the command without erasing the selected member.
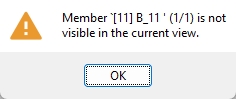
Alternative 2: An alert window appears explaining the member you selected is not visible in the current view. This member is not erased and the command ends when you press Enter or click OK.
Alternative 3: If more than one member has been assigned with the piecemark you selected, the status line prompts you to erase the member with the lowest member number that has the selected piecemark. Accept-Next-Return mouse bindings are activated. Left-click (Accept) and follow step 3 above, or middle-click (Next) to select the next highest member number associated with the selected piecemark, or right-click (Return) to end the command without erasing the selected member. Alternative 2 above could also apply to this situation if one or more members are not visible in the current view.
- Member Erase
- Member Erase by Number (to erase one member at a time)
- Delete (another way to erase members)
- Member Undelete (restores selected members that have been erased)
- Visual Undelete
- Quick Undelete
- Release Deleted Members (Home > Utilities > Utility Functions > Delete)

